Redwood Sew-a-Long Day 4!
Redwood Vest Sew-Long Day 4 - Zipper Shield and Front Zipper
When I last left you, we finished putting the collar and collar binding on. Today we are going to install the front zipper. This is the part I always get nervous about. However, on each of the vests I’ve made it has turned out fine. I think I hear the word zipper and get nervous.
Take note: During this part of the pattern. The seam allowance changes.
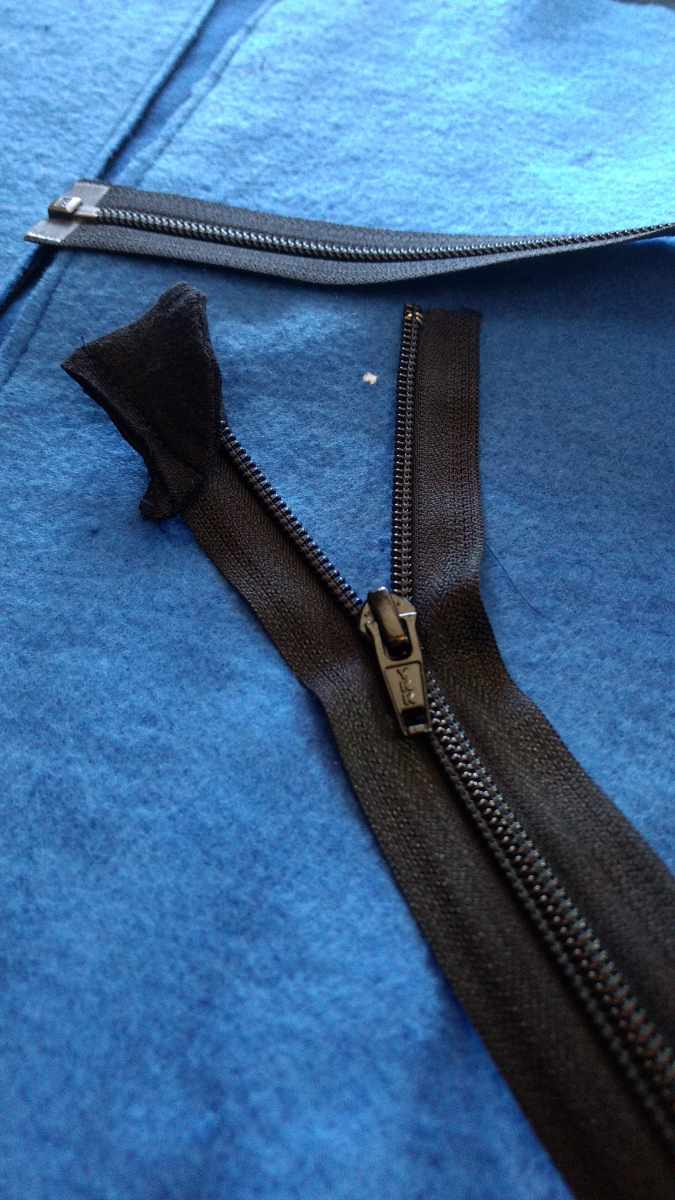
First - sew up the zipper shield. I hate this piece. It’s so tiny. I am just using my binding fabric for my piece. You can use a woven fabric on this piece if you want.
.jpg)
If you haven’t cut your zipper binding, do that now. The chart for cutting is in your pattern.
Now grab your main zipper and lay your vest on your work table right side out. Flip your zipper upside down so right sides are facing. The pattern tells us to extend the bottom of the zipper a ½” past the bottom and ⅛” past the top. There are instructions in the pattern for shortening zippers. Then there are 3 chalk marks to make - top, collar, color blocked yoke.
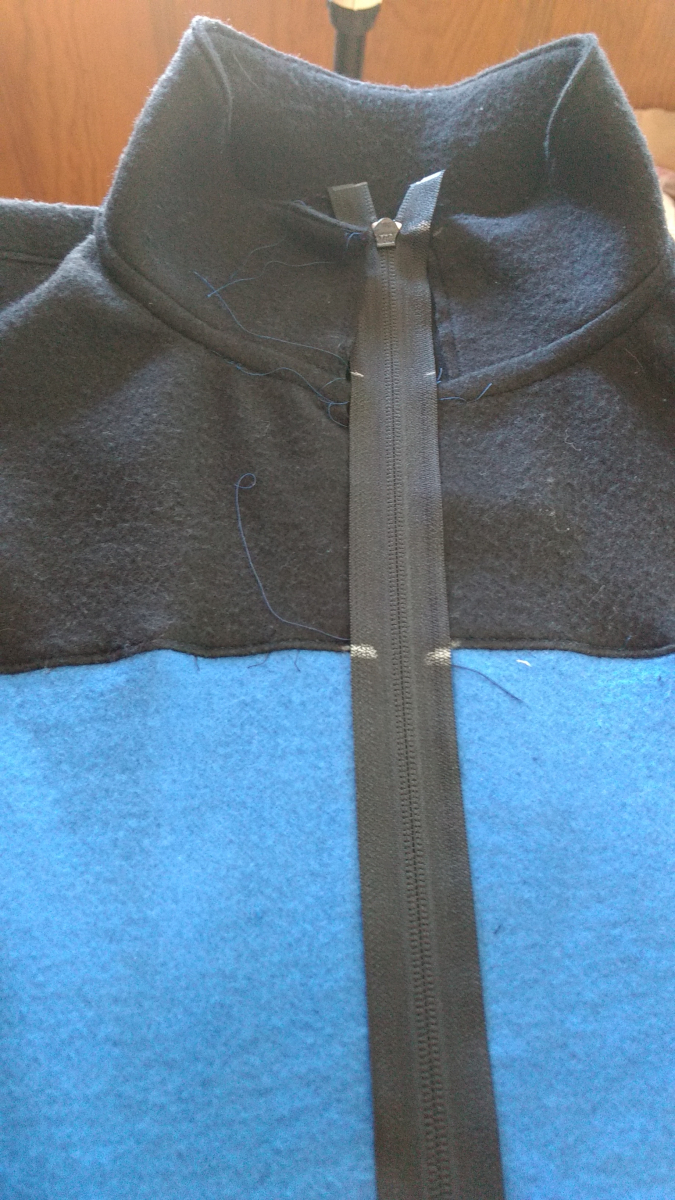
Add the Zipper shield to the side of the zipper that has the slide on it.
Prepare the zipper binding according to the pattern.
Baste the zipper binding to the wrong side of the zipper. The short FINISHED end will be at the TOP of the zipper. Using Wonder Tape makes this much easier. Make sure you have your zipper foot on the machine, and baste the binding, raw edges matching to each of the sides of the zipper.
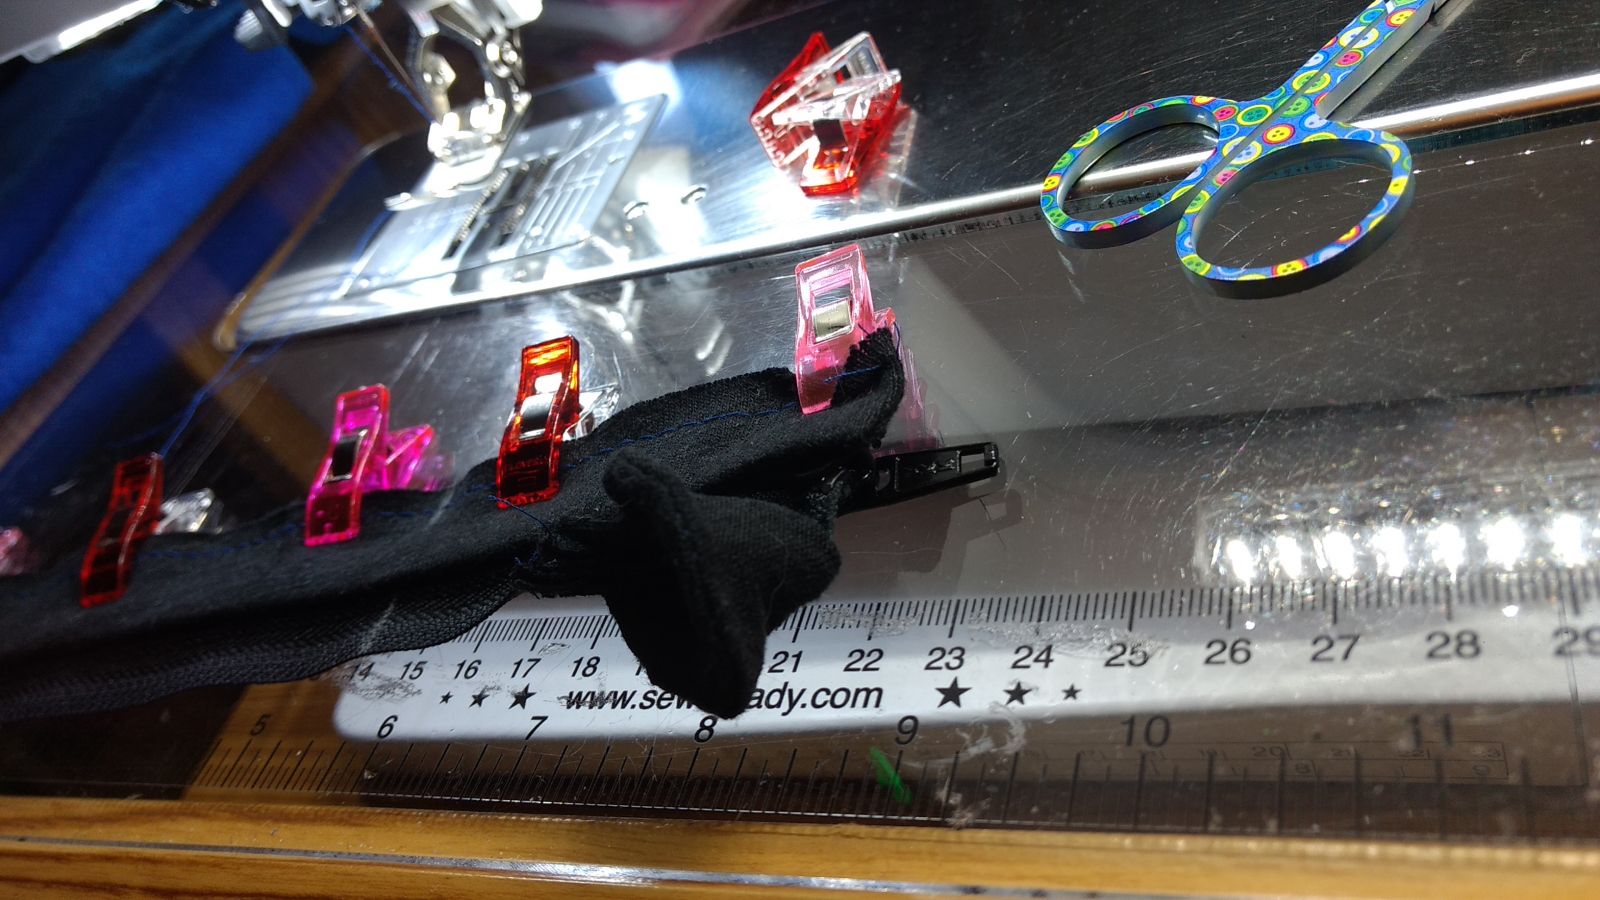
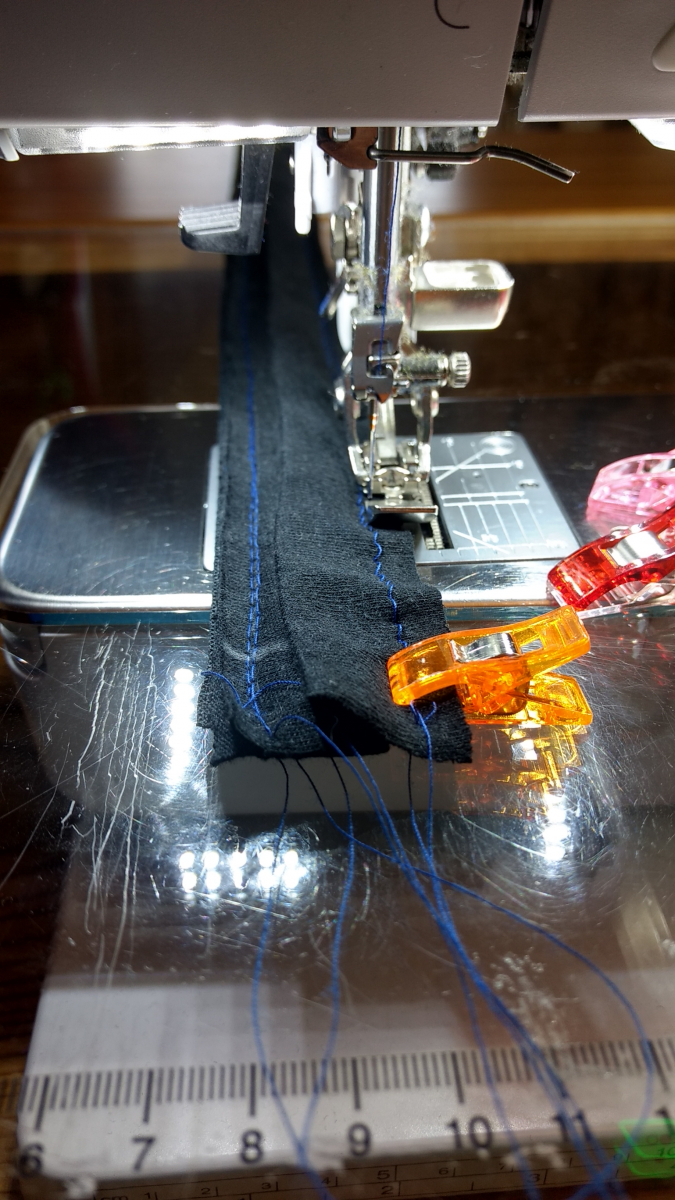
Transfer chalk marks to binding.
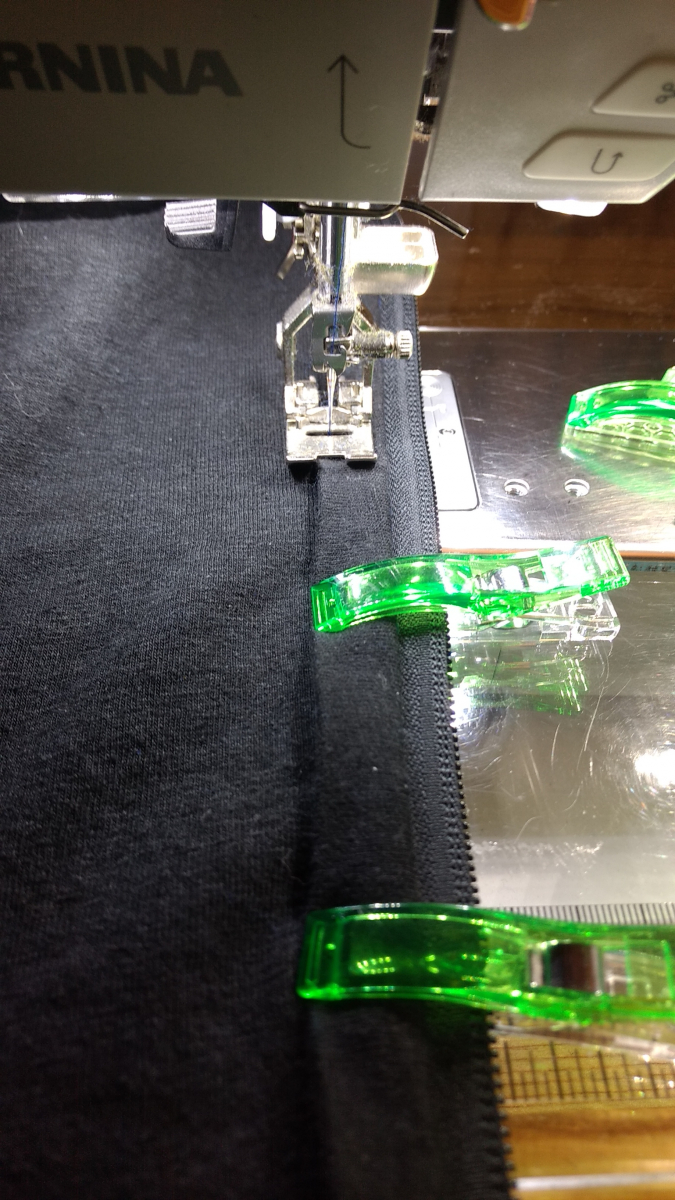
Start with the zipper zipped. Clip or pin it to the left side (left when you are wearing the vest) of your vest and line up the chalk marks. UNZIP the zipper and pin or clip the other side of the zipper to the right side (right when you are wearing the vest).

I always zip it up at this point to check my lines. It’s kinda awkward with all the clips, but it will work. Adjust if necessary.
BASTE THE ZIPPER IN PLACE.
Here’s my before and after pictures. After I basted, I wasn’t happy with the lines, so I pull some stitches and adjusted the zipper a bit.
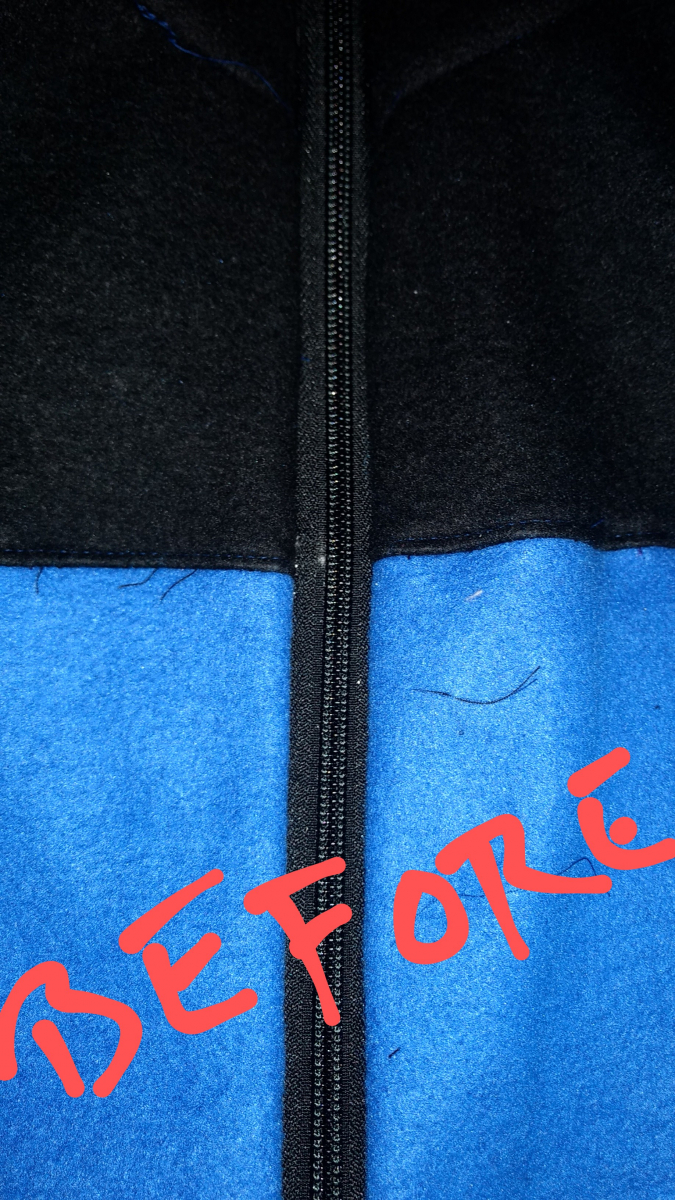
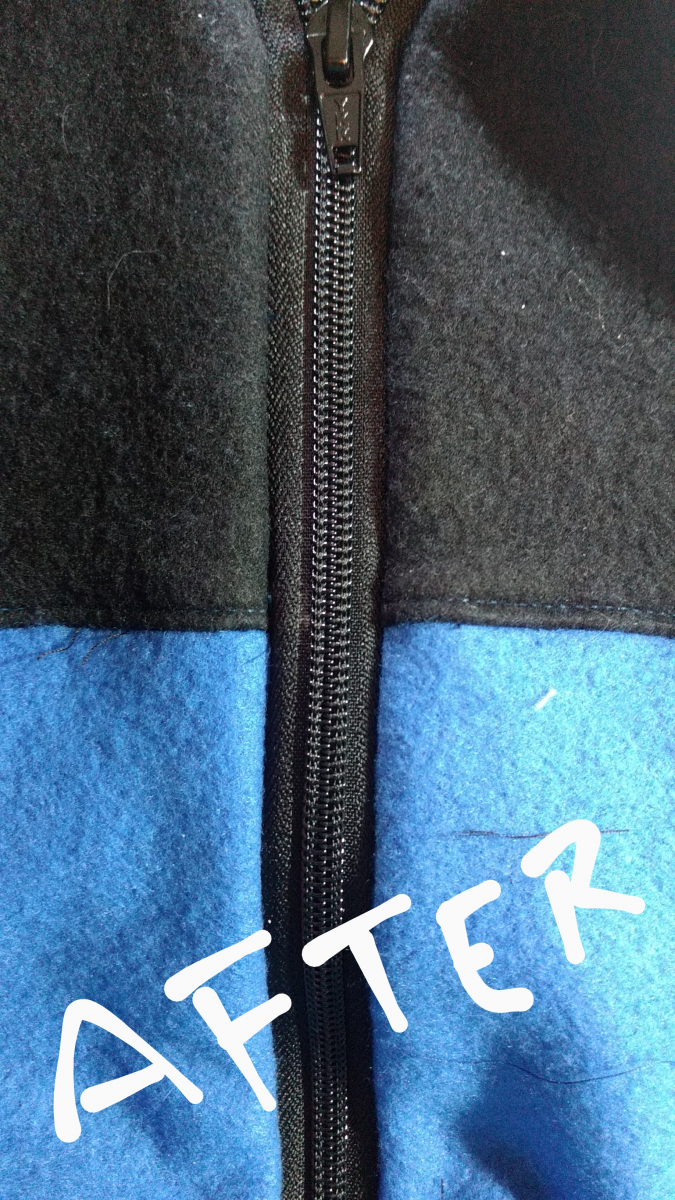
It seems so miniscule, but I had to fix it. EEK!
When you are happy, sew the zipper in.
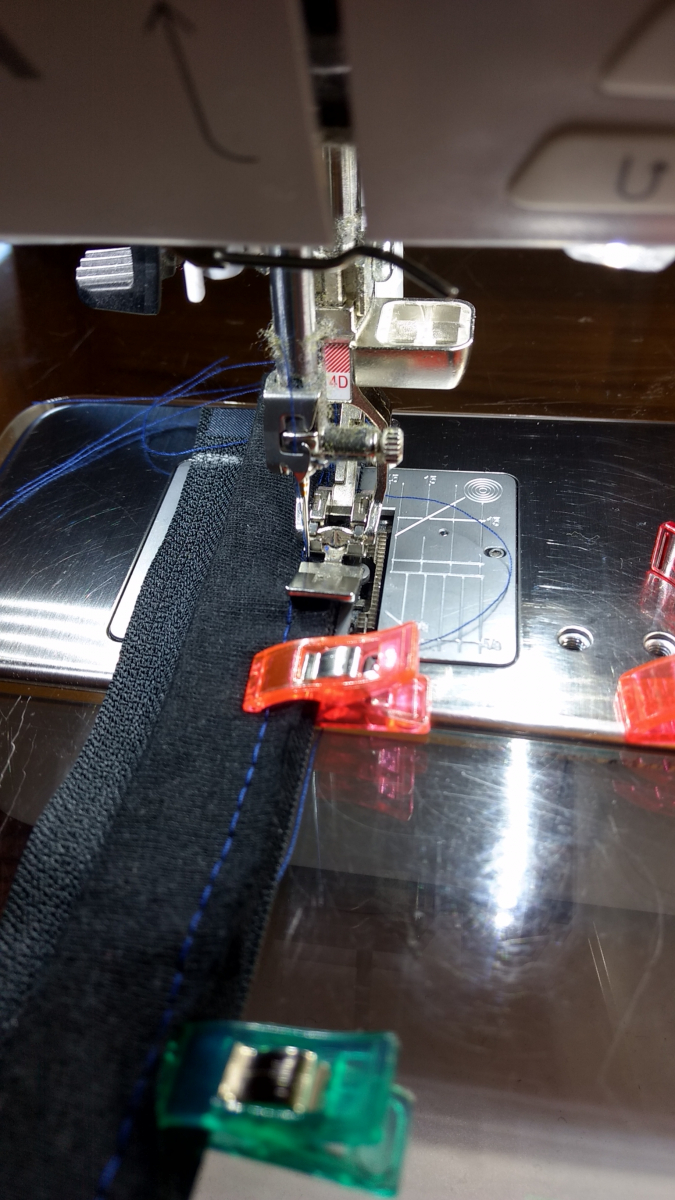
Now let’s sew down the binding. Again, this binding is super easy. Flip the binding to cover the zipper tape and SA. I used a 3.5 stitch length and sewed it down from the wrong side. It gets a bit tricky where the fabric bulges at the yoke, so go slow.
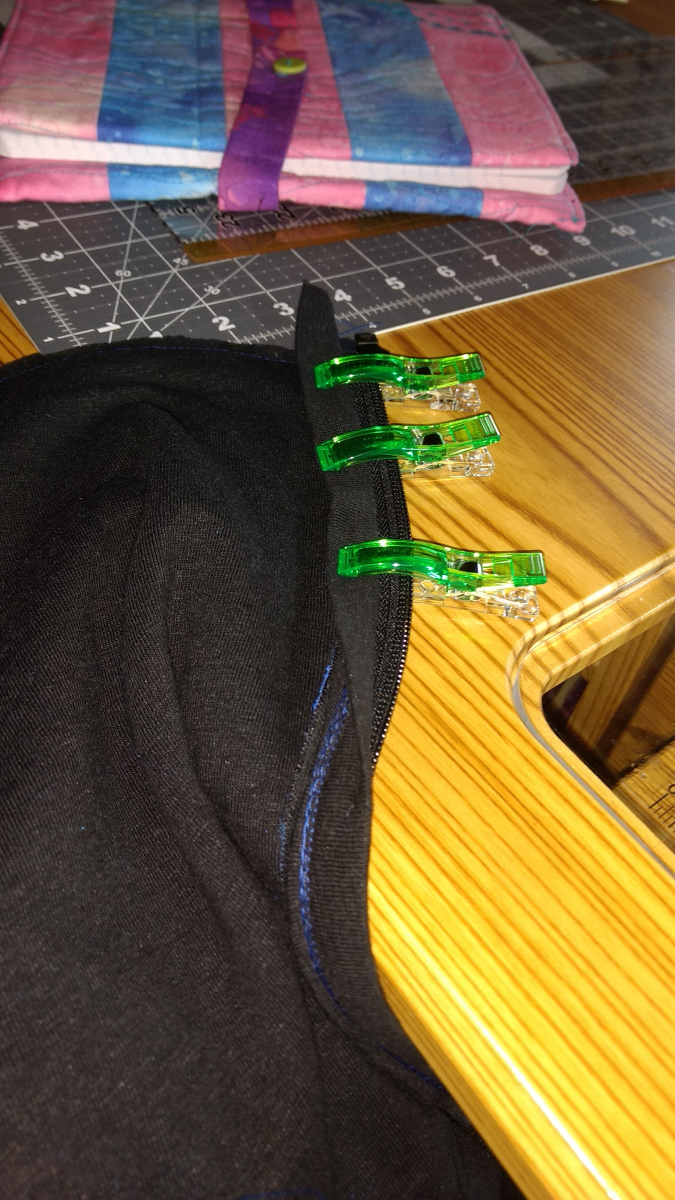
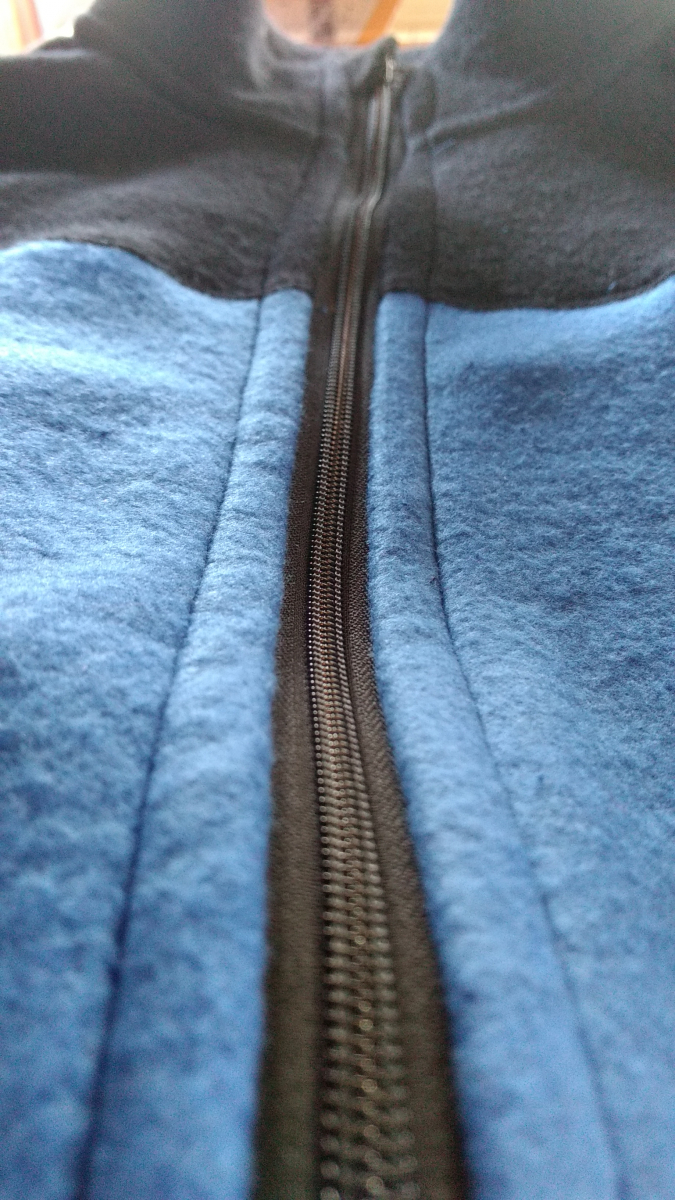
Here's what it should look like on the outside:
WOOHOOOOO!!!!!!!!!!!!!!!!! We're almost done and the hard part is over.
See you next time for armholes and bottom binding.
New to Sew My Style? Learn more and join in here.
Sew My Style 2020 includes these talented sewists, catch up on their #SMS20 posts:
Aaronica @ The Needle & The Bell | Leanne @ Thready For It | Ari @ Max California | Minna @ The Shapes of Fabric | Carol @ Chatterstitch | Michele @ WinMichele | Julian @ Julian Creates | Florence @ FTMom3 | Kelsey @ Seam Lined Living | Kris @ Sew Notes | Laura @ The Specky Seamstress | Samantha @ The Rural Sewist | Sarah @ Haraz Handmade | Shelby @ Handmade Shelby | Simone @ Intensely Distracted | and SMS20 Coordinator Paulette @ Petite Font
To stay up-to-date with all the #SMS20 news, pattern discounts and inspiration, be sure to subscribe to the newsletter at Sew My Style 2020.
Here's the Muppets...because the make me happy.


Comments
Thanks for this sew along. I just discovered your blog via the sew my style newsletter. I bought the aspen pattern (female equivalent) and have been meaning to make it this month. Now I have more motivation!
Glad you are here. Your Aspen's going to be awesome!
Post new comment