Redwood Sew-a-Long Day 3!
Color Blocked Yoke
First off, I cut my lining quite a bit larger than the pattern piece. This is because the first time I made this vest, my lining didn’t match up due to stretch and wonkiness.
Grab a front piece, a front lining piece, and a front yoke piece. Place your vest lining wrong side up, Lower Front Vest piece right side up, Front Yoke wrong side up. I used my serger to sew across at the top. MAKE SURE YOU HAVE THE ARMSCYE MATCHED. REMEMBER THAT THE NECK GOES ON THE SIDE THAT HAS THE LONGEST STRAIGHT PART (where the front zipper will go).

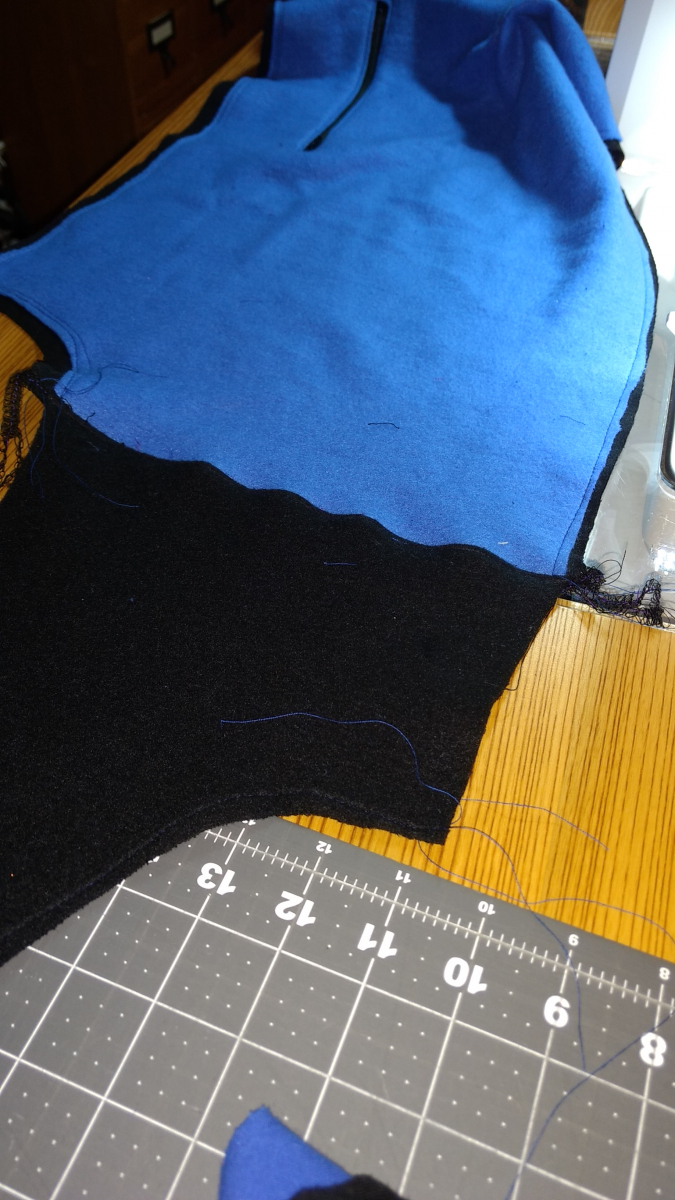
Do this to the other side. Push seams up toward the yoke and topstitch. I used a stitch length of 3.5 for my top stitching. BASTE the lining to the front piece. You should be looking at the RIGHT side of the lining because you have sewed WRONG sides facing (lining to outer)
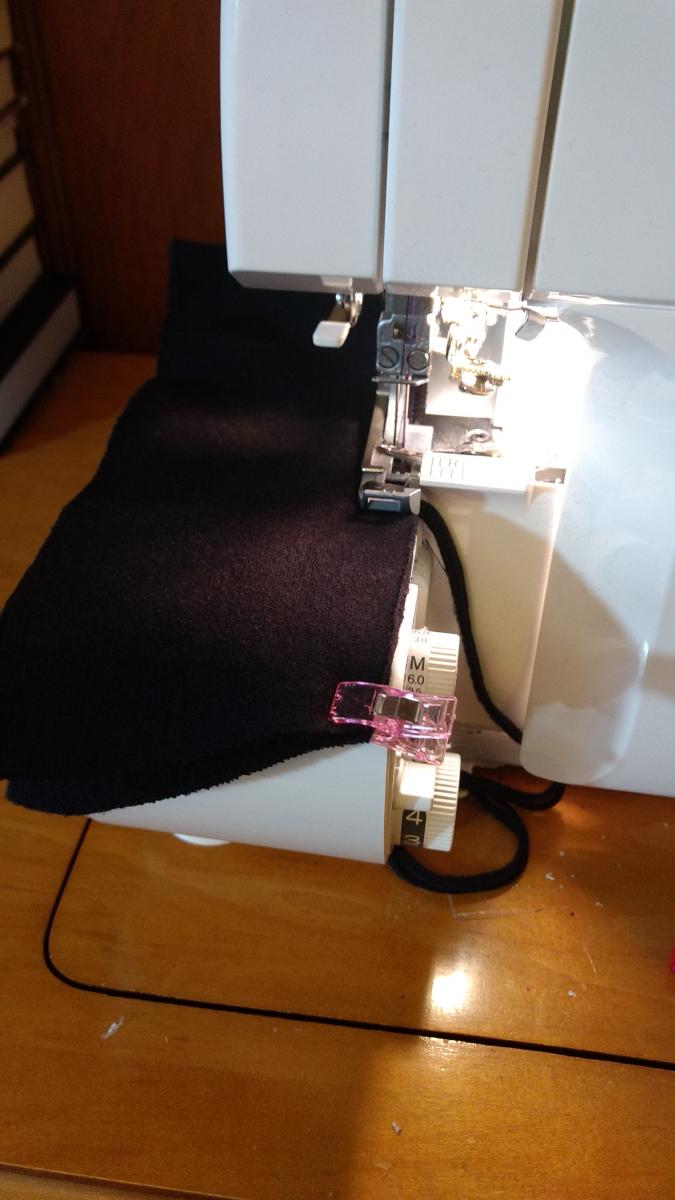
Sew the Back Yoke to the Back piece. I did this on my serger as well. You can also use a stretch or zig zag stitch on your sewing machine. Press or push the seam up and top stitch.
Shoulder, Sides, and Collar
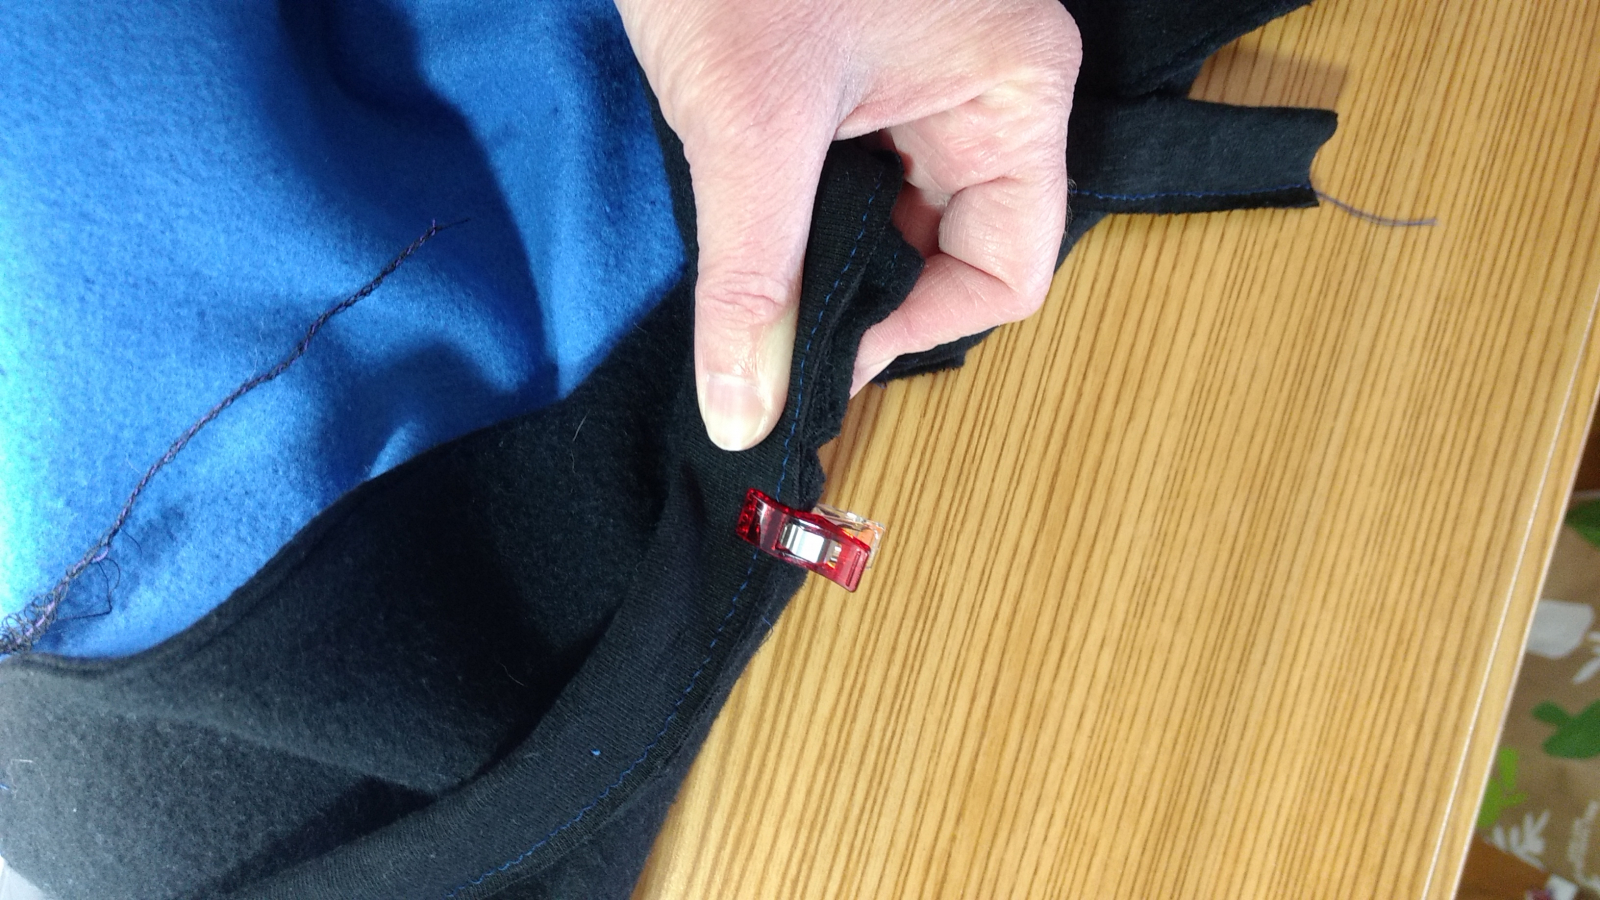
Sew or serge the shoulder seams, then topstitch.
Sew or serge the side seams, then topstitch. Yes, you really want to do this. It looks cool.
Set aside.
Take your 2 collar pieces and place them right side together. Serge only the top.
Turn right side out topstitch, and baste around the other 3 edges.
Cut and baste the binding. Refer to your pattern and cut the appropriate binding piece. My binding is black, so it kinda blends in. Sorry about that. By the way, I love the way the binding works on the collar. Follow the directions, and it’s super easy.
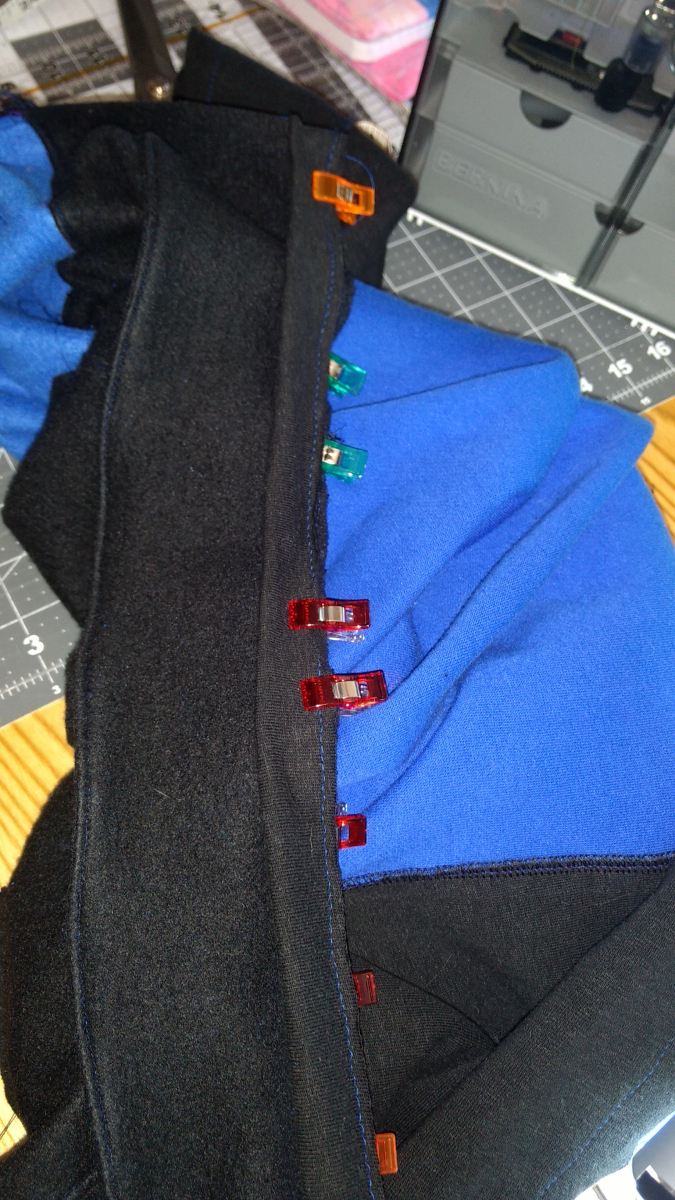
Cut a notch (if you haven’t already) to mark the center of your collar, vest, and binding.
Place your vest RIGHT side up on your work table. Then put the collar on matching the centers and clip or pin. Now add the binding - matching centers.
Now clip or pin ONLY the collar to the vest. Let the binding hang loose right now.
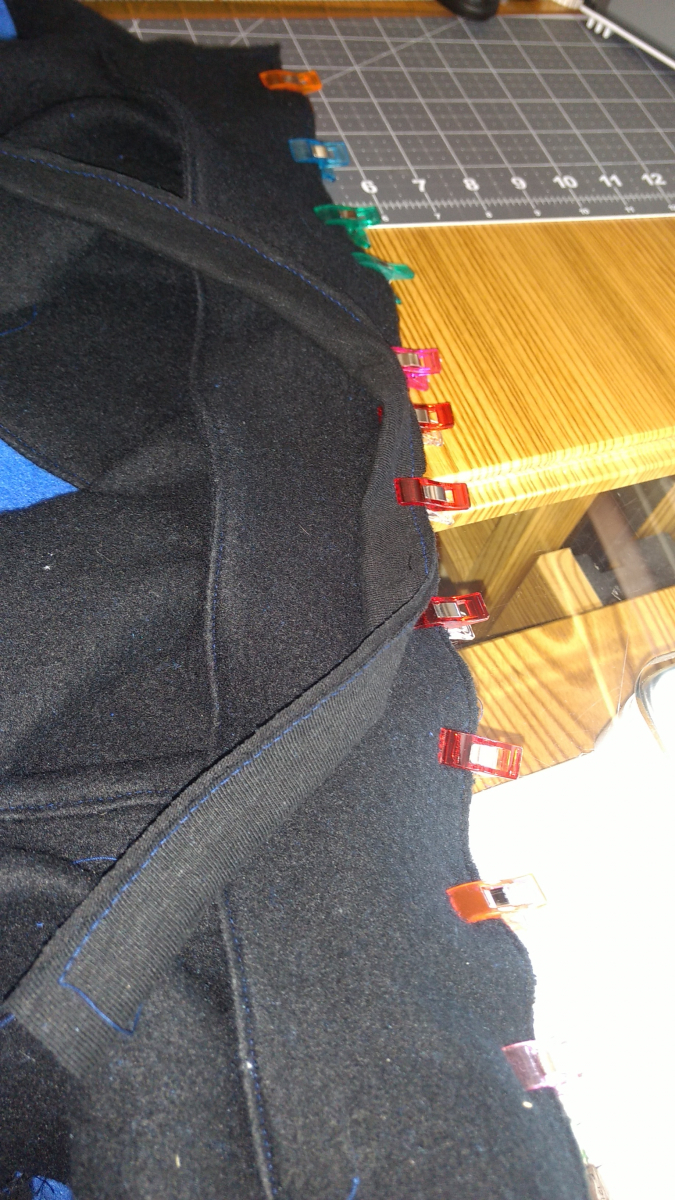
The collar should fit nicely as you ease the two pieces together. Now pin or clip the binding in place. You will need to stretch the binding to fit. Notice in the photo below, I only clipped the binding in the center and at the ends. This allows me to stitch it and stretch it much easier.
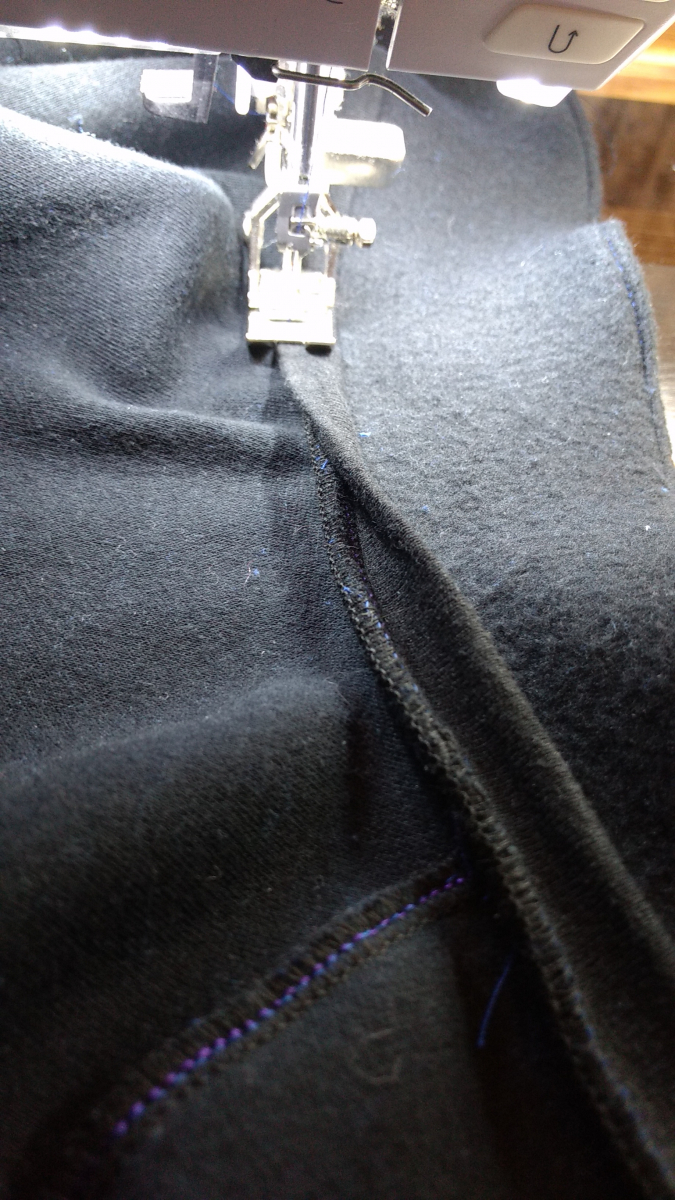
Fold the collar up and the neck binding down and topstitch in place.

Whew! That’s it for today. I hope you are all holding up ok! Let me know if you have questions.
New to Sew My Style? Learn more and join in here.
Sew My Style 2020 includes these talented sewists, catch up on their #SMS20 posts:
Aaronica @ The Needle & The Bell | Leanne @ Thready For It | Ari @ Max California | Minna @ The Shapes of Fabric | Carol @ Chatterstitch | Michele @ WinMichele | Julian @ Julian Creates | Florence @ FTMom3 | Kelsey @ Seam Lined Living | Kris @ Sew Notes | Laura @ The Specky Seamstress | Samantha @ The Rural Sewist | Sarah @ Haraz Handmade | Shelby @ Handmade Shelby | Simone @ Intensely Distracted | and SMS20 Coordinator Paulette @ Petite Font
To stay up-to-date with all the #SMS20 news, pattern discounts and inspiration, be sure to subscribe to the newsletter at Sew My Style 2020.
Nerd alert: I just finished House of Earth and Blood by Sarah J. Maas, and I have a major book hangover.
Today, I think I’ll leave a little Kate Tempest here. She is crazy amazing, and I’ve been putting her on my sewing playlists since I first heard her.


Comments
Post new comment